Morris Minor ShopMorris Down Under Forum Forum Index Classic Car Trader
Log in Register FAQ Memberlist Search Morris Down Under Forum Forum Index

Time for a New Paintjob (Pics!) Registered!!! 23/2/2008
Goto page Previous  1, 2, 3, 4, 5  Next
 
Post new topic   Reply to topic    Morris Down Under Forum Forum Index » My Morry
View previous topic :: View next topic  
Author Message
Skidmond
valued contributor


Joined: 18 Dec 2003
Posts: 1064
Location: Tasmania

PostPosted: Sun Nov 11, 2007 3:52 pm    Post subject: Reply with quote

its looking great Shawn Very Happy keep up the good work and keep the pics coming....


Back to top
View user's profile Send private message
Shawn
Full Licence


Joined: 16 Sep 2005
Posts: 385
Location: Redlands, Brisbane, Australia

PostPosted: Tue Nov 13, 2007 5:58 pm    Post subject: Reply with quote


I've been doing a bit of wet rubbing with some 1200 grit wet & dry. I could not be happier with the results. Very Happy Very Happy Very Happy The photo doesn't do it justice. Flaws that I thought were going to be there forever disappear within seconds, leaving smooth. ready to polish paint. It's really motivating.

I've only rubbed through to the primer in two spots. They'll be easy touch-ups

This is the most fun I've had so far in this project.

Sad, isn't it Very Happy


Back to top
View user's profile Send private message Send e-mail
Triumph Man
valued contributor


Joined: 13 Sep 2003
Posts: 1890

PostPosted: Wed Nov 14, 2007 7:25 am    Post subject: Reply with quote

Shawn wrote:


I've been doing a bit of wet rubbing with some 1200 grit wet & dry. I could not be happier with the results. Very Happy Very Happy Very Happy The photo doesn't do it justice. Flaws that I thought were going to be there forever disappear within seconds, leaving smooth. ready to polish paint. It's really motivating.

I've only rubbed through to the primer in two spots. They'll be easy touch-ups

This is the most fun I've had so far in this project.

Sad, isn't it Very Happy

And it keeps getting better. Once you start running the buff over it, then wash it down it will gleam.
I know it's hard but try & leave it a few weeks before polishing up. The paint is still hardening, & solvents are still being released.
The harder any surface the better it will polish up.
If you wax over the surface to early you can trap the solvents in.
After useing a buffing compound then use a softer cut polish (same as sanding with 300, 600 then 1200) then seal with a canuba wax polish.
She will gleam Very Happy
Trev
Aus


Back to top
View user's profile Send private message
oliver-morrisminor
Full Licence


Joined: 14 Nov 2005
Posts: 998
Location: Brisbane, Redlands.

PostPosted: Wed Nov 14, 2007 1:50 pm    Post subject: Reply with quote

Well my Tourer was painted 9 years ago
and has never been polished.

It should polish up a treat.
I was going to give it the once over during the Christmas break.


Back to top
View user's profile Send private message Visit poster's website
Shawn
Full Licence


Joined: 16 Sep 2005
Posts: 385
Location: Redlands, Brisbane, Australia

PostPosted: Tue Nov 20, 2007 7:35 pm    Post subject: Reply with quote


Very Happy Very Happy Very Happy


Back to top
View user's profile Send private message Send e-mail
oliver-morrisminor
Full Licence


Joined: 14 Nov 2005
Posts: 998
Location: Brisbane, Redlands.

PostPosted: Wed Nov 21, 2007 2:07 pm    Post subject: Reply with quote

Top Job!
Very Nice
Keep the pictures coming


Back to top
View user's profile Send private message Visit poster's website
dirty hands
At rest


Joined: 16 Jun 2006
Posts: 693
Location: Ipswich QLD

PostPosted: Thu Nov 22, 2007 12:38 am    Post subject: Reply with quote

green restoration by november

is a fantastic effort Shocked


Last edited by dirty hands on Sun Mar 16, 2008 7:55 am; edited 4 times in total
Back to top
View user's profile Send private message
Shawn
Full Licence


Joined: 16 Sep 2005
Posts: 385
Location: Redlands, Brisbane, Australia

PostPosted: Sun Nov 25, 2007 6:29 pm    Post subject: Reply with quote

Many Panels re-fitted, polishing begun. I've found a few more small runs I'm gonna have to rub back.

Also, a useful tip: Fit the hinges to the bonnet, then the bonnet to the car BEFORE you fit the front wings, or you will scratch them. Mad


Back to top
View user's profile Send private message Send e-mail
Shawn
Full Licence


Joined: 16 Sep 2005
Posts: 385
Location: Redlands, Brisbane, Australia

PostPosted: Sun Dec 30, 2007 8:23 pm    Post subject: Reply with quote


Plumbed in and running again as of this evening. Very Happy Very Happy Very Happy
(this photo if from a bit before the starting of the engine)
Took a little while to get it started, first the oil pump wouldn't prime, then the fuel pump wouldn't prime, then some idiot had the plug leads out by one position on the dizzy cap...


Back to top
View user's profile Send private message Send e-mail
Skidmond
valued contributor


Joined: 18 Dec 2003
Posts: 1064
Location: Tasmania

PostPosted: Mon Dec 31, 2007 8:40 am    Post subject: Reply with quote

thats looking great Shawn, keep the pics coming mate


Back to top
View user's profile Send private message
Shawn
Full Licence


Joined: 16 Sep 2005
Posts: 385
Location: Redlands, Brisbane, Australia

PostPosted: Fri Jan 04, 2008 10:05 pm    Post subject: Reply with quote

My headlamp wiring was in a terrible state. High and low beam had been crossed at some stage, some wires had been joined by the old twist and tape method, and I wanted to add proper H4s with integral parker units.

So I bit the bullet and scrapped the lot from the bullet connectors forward. Using a little collection of relay holders from a VN Commodore and a home made bracket, I put this lot together. The relay coils are fed from the original switch wiring with new 12V fused feeds for each relay. Almost all conections are soldered.

These are work-in-progress pics (hence the couple of missing connections), but the unit fits pretty neatly on the inner guard, and should offer much more protection and brighter lights then the former setup.


Back to top
View user's profile Send private message Send e-mail
John Ballard
valued contributor


Joined: 11 Feb 2004
Posts: 2646
Location: Dubbo NSW

PostPosted: Sat Jan 05, 2008 12:14 pm    Post subject: Reply with quote

I have relays on mine also. I fitted them under dash to preserve originality Bought two 30 amp relays ( Supercheap) one per head light fitted fuse each light used standard switch and highbeam dipper Also relays on driving lights .
All this caused a MAJOR problem as car was generating 22 amps and using 34 amps night driving slowly draining battery on long trips However Mg Midget alternator solved the problem.
Yellow Ute Yellow Sedan Eye Rolls


Back to top
View user's profile Send private message Send e-mail
Shawn
Full Licence


Joined: 16 Sep 2005
Posts: 385
Location: Redlands, Brisbane, Australia

PostPosted: Thu Jan 17, 2008 8:14 pm    Post subject: Reply with quote

More wiring... woohoo Eye Rolls

Getting closer to being finished here. Many small things have been improved, fixed or removed altogether. I've taken out a huge amount of redundant wiring, most of which was non standard. There were seven wires earthed to the firewall - when I traced them back to their origins only two were actually connected to anything! I also added my badge bar, which fits nicely between the two foglight mounts. It started life as a wardrobe hanger rod!


These are all work in process pics - when I'm satisfied everything is working as it should be, I'll set about tiding it up. (Now would be a good time to buy shares in cable tie companies!)


On the more positive side (boom-tish), my fog lights work nicely, as does the aux input for my MP3 player! (it's the 3.5mm plug barely visible on the top RHS of the radio facia) Sound quality is excellent too, despite the prehistoric second hand components! Can't wait to try it with the 10"sub and 100w Amp!


I've also added the second fusebox for the lights' relays and whatever else I decide to run off it. It's a mixture of ignition switched and unswitched terminals.


Back to top
View user's profile Send private message Send e-mail
Triumph Man
valued contributor


Joined: 13 Sep 2003
Posts: 1890

PostPosted: Fri Jan 18, 2008 10:16 am    Post subject: Reply with quote

Man your screaming along Very Happy lookin great.
Trev
Aus


Back to top
View user's profile Send private message
John Ballard
valued contributor


Joined: 11 Feb 2004
Posts: 2646
Location: Dubbo NSW

PostPosted: Sun Jan 20, 2008 7:58 pm    Post subject: Reply with quote

Congratulations on your progress .Love the colour.
Just a couple of tips for others following. Headlights only need one relay high beam and one low beam
100watt high beam uses about 8 amps therefore two equals 16amps.
As most relays are 30 amp one will more than do the job.
On fuses and holders the coloured blade type are a smaller and neater unit and fuses can be bought any where,
Always add you power consumption up as the morris generator only puts out 22 amps of charge, and after some night time running the battery supply drops quickly. Yellow Sedan Yellow Ute Red Convertible Red Woody Red Van


Back to top
View user's profile Send private message Send e-mail
Scouse
moderator


Joined: 15 Sep 2003
Posts: 5266
Location: Wollondilly, NSW

PostPosted: Sun Jan 20, 2008 8:06 pm    Post subject:
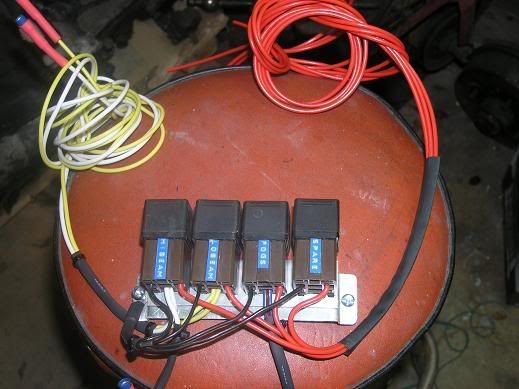
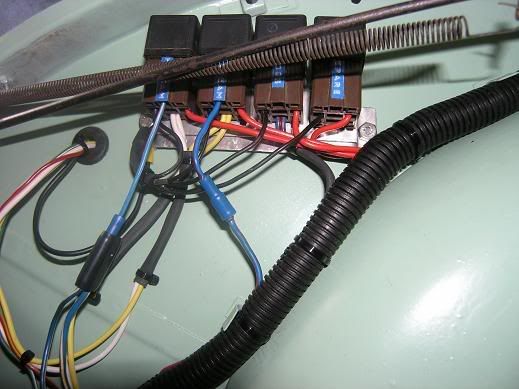
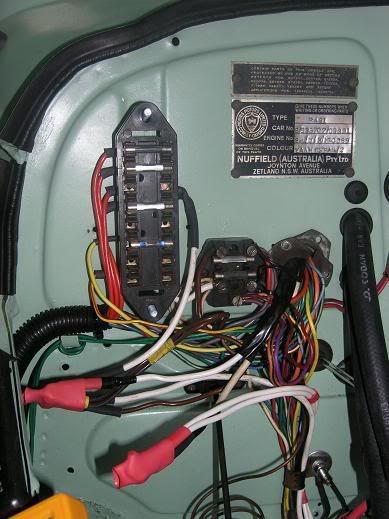
 Reply with quote

John Ballard wrote:
On fuses and holders the coloured blade type are a smaller and neater unit and fuses can be bought any where,
The Datsun/Nissan Bluebird uses a similar sized fuse box. It holds about 12-16 modern fuses & can also hold 4 relays.


Back to top
View user's profile Send private message
Shawn
Full Licence


Joined: 16 Sep 2005
Posts: 385
Location: Redlands, Brisbane, Australia

PostPosted: Fri Jan 25, 2008 6:06 pm    Post subject: Reply with quote


Rear Guards bolted up and tail lights sorted. These too were re-wired with new and better connections.

Initially I couldn't get the brake lights to work, it turned out that there was so much air in the system that not enough pressure was building in the lines to activate the switch. A thorough bleeding with a pressure bleeder soon fixed the problem. I'd never used a pressure bleeder before, and was amazed at just how easy it was (compared to getting an un-cooperative family member to pump the pedal for you!) All it is is a tyre valve stem fitted to an old master cylinder cap - one press with a foot pump and presto! - no more air. Pedal feel is excellent!


Back to top
View user's profile Send private message Send e-mail
Auspest
I've got trainer wheels


Joined: 19 Jan 2008
Posts: 15
Location: Brisbane

PostPosted: Fri Jan 25, 2008 8:47 pm    Post subject: Reply with quote

Just about there Shawn. And i am just starting
Just about take it to Ormistom for the Aust Day Run

Scott C


Back to top
View user's profile Send private message Send e-mail
Shawn
Full Licence


Joined: 16 Sep 2005
Posts: 385
Location: Redlands, Brisbane, Australia

PostPosted: Mon Jan 28, 2008 6:59 pm    Post subject: Reply with quote

The Ford Laser tribute post!

Installed window & door rubbers today. The horizontal window (squeegee) rubbers are courtesy of a '90s Ford Laser. Can be made to fit very neatly. You can use the original spring type clips, but only need a couple per window.

The door handle bump stop rubbers are also off the same Laser. they're the cushioning rubbers for the interior light switches. You use the retaining part, which is normally hidden and cut off the rest - each rubber has two retaining lugs. I couldn't find anything to neatly fit these holes anywhere.

Also off the same Laser, but not shown in these pics is the rubber strip at the top of the firewall, which seals on a Morris in the same was as it does in the Laser. (You can see it in the engine bay/foglight shot a couple of posts back)

Also today, finished wiring in my Hazard lights, which work nicely, adjusted the panel fit on the doors (which is only ok), and began tidying the wiring.


Back to top
View user's profile Send private message Send e-mail
dirty hands
At rest


Joined: 16 Jun 2006
Posts: 693
Location: Ipswich QLD

PostPosted: Tue Jan 29, 2008 7:24 am    Post subject: Reply with quote

there is no way anyone could pick that from the original pictures of the morry

how many hours or are you not counting

now shannons insurance will want your business Very Happy


Back to top
View user's profile Send private message
Shawn
Full Licence


Joined: 16 Sep 2005
Posts: 385
Location: Redlands, Brisbane, Australia

PostPosted: Sun Feb 03, 2008 7:41 pm    Post subject: Reply with quote

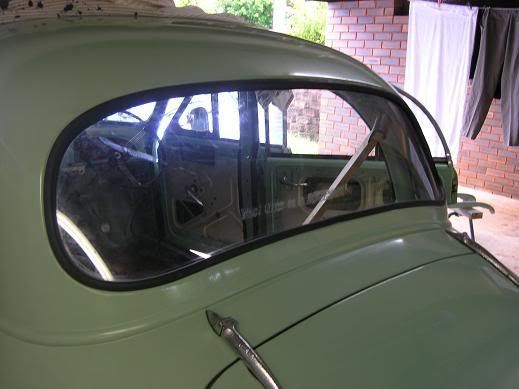
Ok, a big weekend of work.

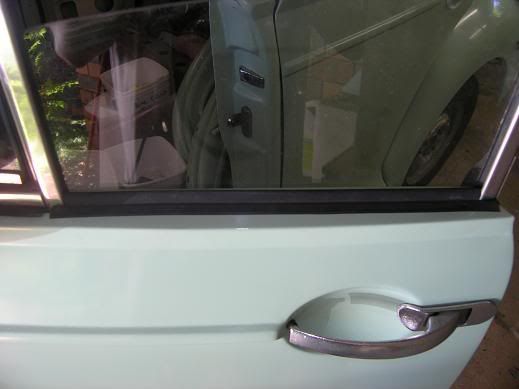
Firstly, I thought I'd have a go at the windscreens myself before I asked for help. The hardest part was fitting the chrome trim. I used an old leadlighting tool to help ease it in.

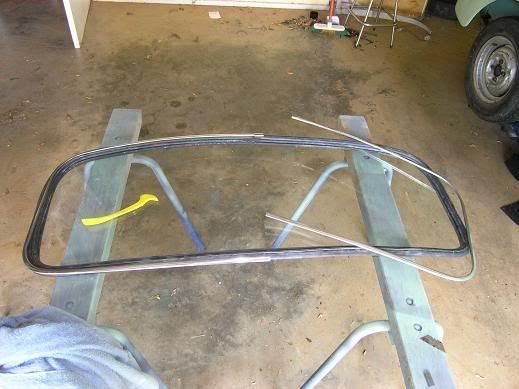
The screens were much easier to fit than I'd expected. The front one went in very easily on the first attempt. I used a length of medium gauge electrical cable as a drawstring. I think the fact that it was smooth and fairly thick made the whole job much easier.


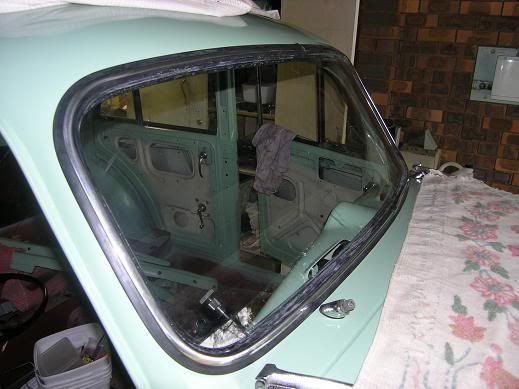
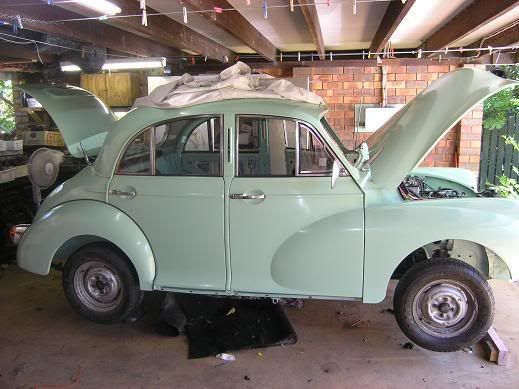
The rear was not quite as easy, but certainly not too difficult. I could see where a helper was needed here, so I made one myself. He was a good, willing and efficient worker, but somewhat lacking in conversation skills. He was very effective, in that when I pushed the screen from the inside, he slid down the window, locking it in place, sort of like a rachet effect.

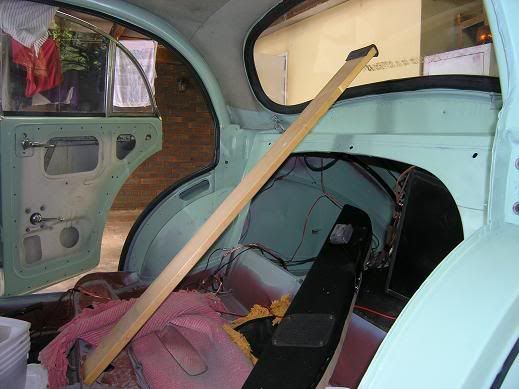
The rear screen needs a little more manipulating, but I'll wait for a hot sunny day for that!


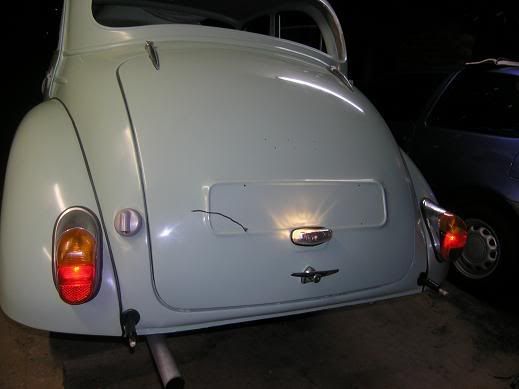
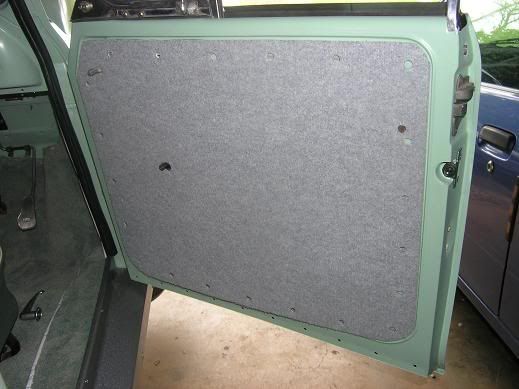
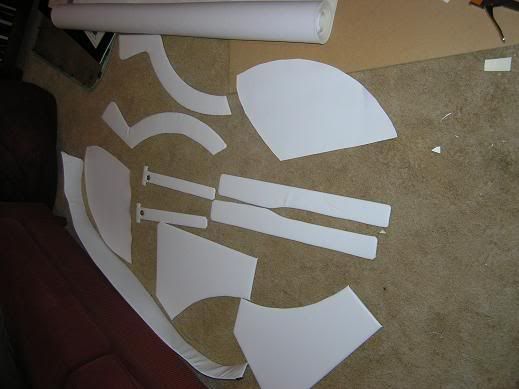
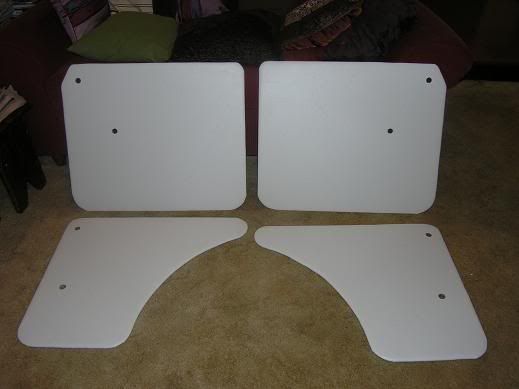
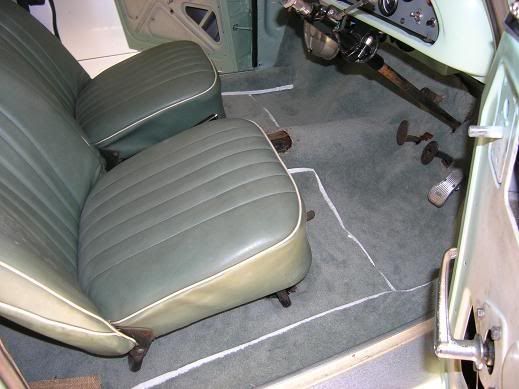
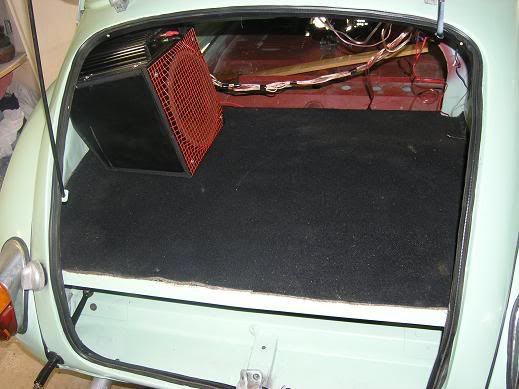
Finally, on Sunday, I finished refitting the boot, bolting in the floor panels and cutting a piece of car carpet to fit. I also made new trim cards for beside the rear seat, the B pillars and the front footwell. More on those soon.


Back to top
View user's profile Send private message Send e-mail
Shawn
Full Licence


Joined: 16 Sep 2005
Posts: 385
Location: Redlands, Brisbane, Australia

PostPosted: Wed Feb 13, 2008 6:33 pm    Post subject: Reply with quote

Interior trim time. All of these panels are cut from templates of the originals. I've kept them. The base material is felt covered plastic from office display boards. It gives a soft padded feel to it, but will be very water resistant. It should be far less likely to warp too. The orginal masonite door cards are badly warped.

Test fitting

A, B & C panels.

Door trims ready to fit (unless I get all motivated and decide to make some piping for the edges...)

I made these door pulls. Despite trying to take the credit, kittens are rubbish at sewing.

Front seats and carpet almost finished


Back to top
View user's profile Send private message Send e-mail
Drew
valued contributor


Joined: 04 Dec 2007
Posts: 133
Location: Blue Mountains/Central West, NSW.

PostPosted: Fri Feb 15, 2008 8:43 pm    Post subject: Reply with quote

Superb progress Shawn. Great to see it all coming together. You are an inspiration.

Keep up the photos,

Andrew.


Back to top
View user's profile Send private message Visit poster's website
Shawn
Full Licence


Joined: 16 Sep 2005
Posts: 385
Location: Redlands, Brisbane, Australia

PostPosted: Sat Feb 16, 2008 7:29 pm    Post subject: Reply with quote

Drew wrote:
...You are an inspiration...


...sometimes I amaze myself.


Embarassed Embarassed


Back to top
View user's profile Send private message Send e-mail
Skidmond
valued contributor


Joined: 18 Dec 2003
Posts: 1064
Location: Tasmania

PostPosted: Sat Feb 16, 2008 8:27 pm    Post subject: Reply with quote

geez Shawn, when you get that finished, you wont know what to do with yourself.

I might send another 4 door over for you, you know, just to keep you busy Very Happy


Back to top
View user's profile Send private message
Display posts from previous:   
Post new topic   Reply to topic    Morris Down Under Forum Forum Index » My Morry All times are GMT + 10 Hours
Goto page Previous  1, 2, 3, 4, 5  Next
Page 4 of 5

 
Jump to:  
You cannot post new topics in this forum
You cannot reply to topics in this forum
You cannot edit your posts in this forum
You cannot delete your posts in this forum
You cannot vote in polls in this forum


Powered by phpBB © 2001- 2004 phpBB Group
Theme created by phpBBStyles.com | Themes Database